Enhance your organization’s productivity by creating centralized Prompt repositories
As organizations increasingly adopt Microsoft Copilot and other Generative AI tools, having quick access to a shared repository of prompts, such as a Microsoft Lists Prompt Library, can significantly boost team efficiency and consistency. Whether you’re focused on content creation, coding, design, or project management, a well-organized Prompt Library serves as a valuable resource for teams within your organization.
The design inspiration for the Prompt Cards used in this guide comes from the Copilot Lab, which offers a visually engaging way to organize and display prompts. Additionally, the idea to leverage Microsoft Lists for building a prompt library was initially sparked by Sue Hanley.

Microsoft Lists offers a flexible platform to create, manage, and share such a library. In this blog post, I’ll walk you through setting up a dynamic and visually engaging Prompt Library using Microsoft Lists. We’ll cover:
- Creating a List: Setting up the foundational structure for your Prompt Library.
- Adding Necessary Columns: Defining the data fields required to capture comprehensive prompt information.
- Applying List View Formatting: Enhancing the visual appeal and functionality of your library with custom formatting.
- Crowdsourcing Prompts: Implementing a simple method to gather prompts from your team without oversharing.
- Implementing Approvals and Templating: Introducing concepts for managing submitted prompts and creating multiple prompt libraries efficiently.
By the end of this guide, you’ll have a robust Prompt Library that not only centralizes valuable prompts but also fosters collaboration and streamlined workflows within your organization.
Creating a Microsoft Lists Prompt Library
Building a Prompt Library with Microsoft Lists involves creating a new list, adding relevant columns, and customizing the view to suit your team’s needs.
Setting Up the List
Begin by navigating to Microsoft Lists and creating a new blank list. Name it “Prompt Library” and provide a description such as “A centralized repository of prompts for our team.”
Consider saving the list on a SharePoint site accessible to all team members who will use the library, ensuring easy collaboration and access.

Adding Essential Columns
With your list created, define the information you want to capture for each prompt. Here are the key columns to include:
- Title (Single line of text): A concise name for the prompt.
- Prompt (Multiple lines of text): The full text of the prompt.
- Prompt Category (Choice): Categorize prompts for easy filtering. Possible categories might include Understand, Create, Catch up, Ask, Edit, Learn, Design, Code, Analyze, and Manage.
- Works in (Choice with multiple selections): Specify the applications or contexts where the prompt is effective. Choices could include platforms like Copilot for Microsoft 365, ChatGPT, GitHub Copilot, Teams, Outlook, Word, Excel, PowerPoint, and more.
- Make it your own (Multiple lines of text): Any extra details or tips on how to customize or adapt the prompt.
- Icon (Calculated Column): This column automatically assigns an icon based on the selected Prompt Category, enhancing visual recognition in the list view. I use Fluent UI icons for consistency and visual appeal. For finding additional icons, a great community resource developed by Chris Kent is available at flicon.io.
Detailed instructions and the formula for the Icon calculated column are available in the PnP List View Formatting Samples – Prompt Cards repository.
Enhancing Your Microsoft Lists Prompt Library with View Formatting
A functional Prompt Library is excellent, but making it visually engaging can significantly improve user experience. List view formatting allows you to transform your list items into interactive and informative cards.
Applying the Formatting
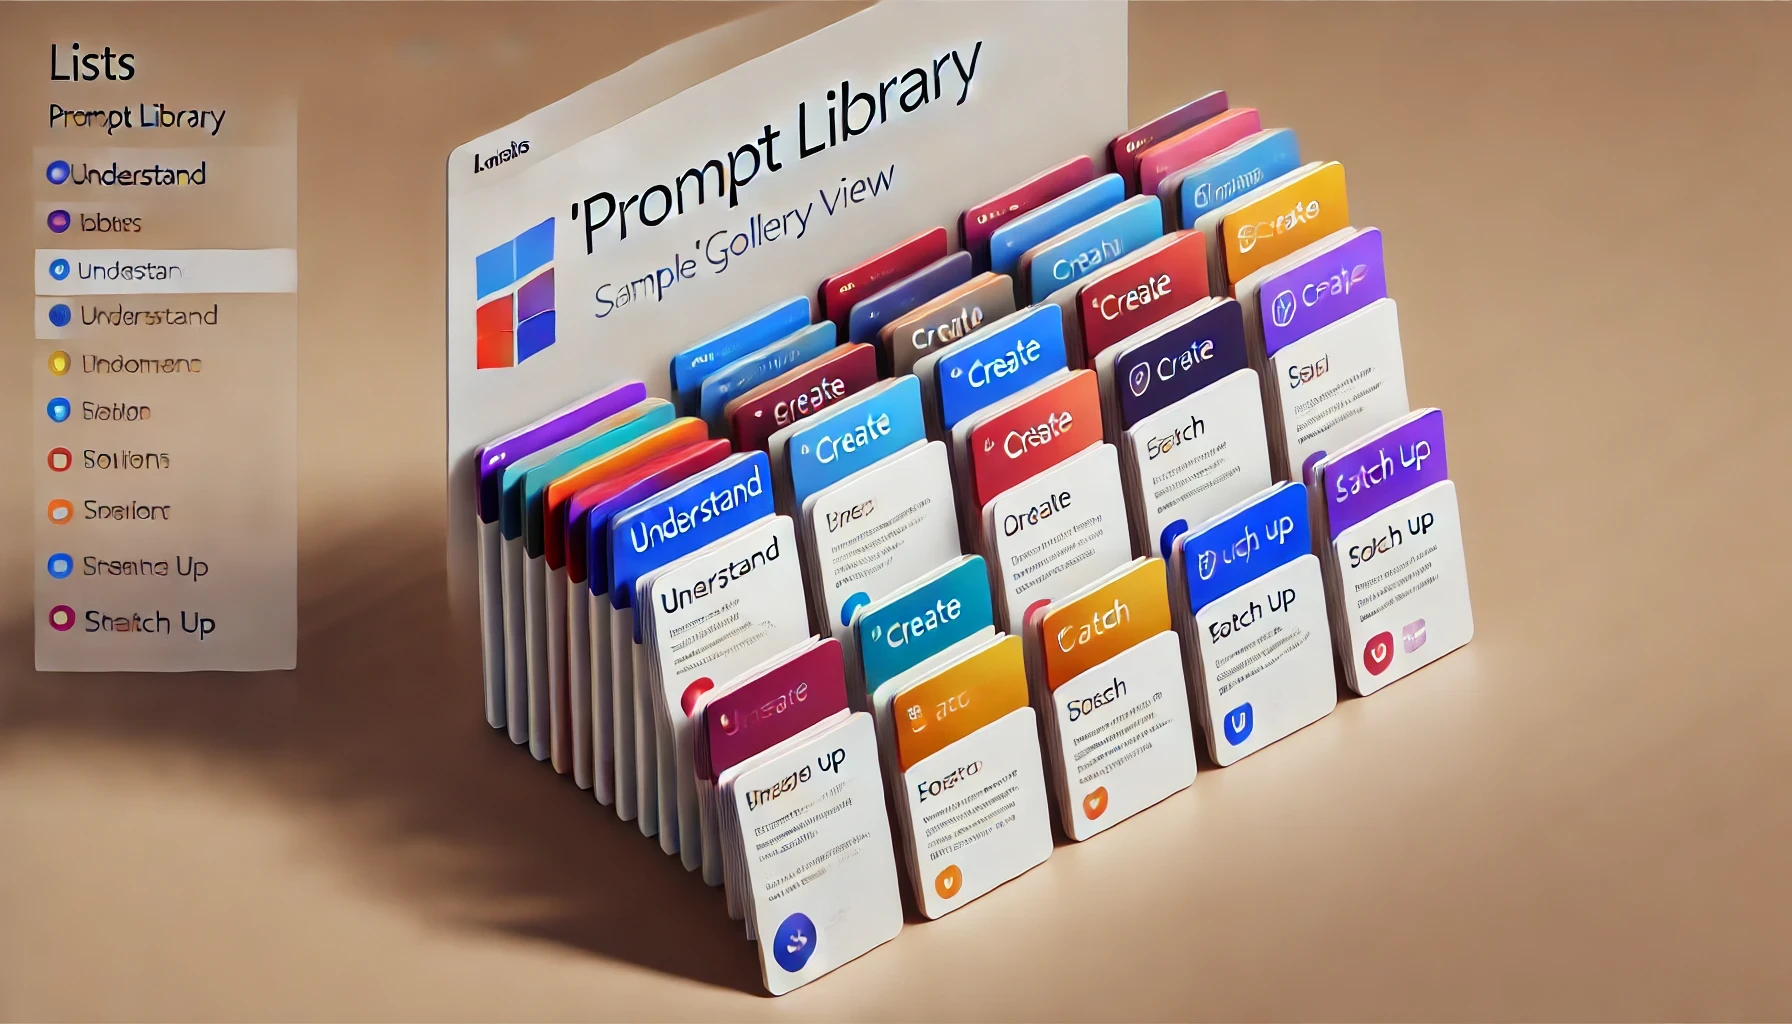
Start by navigating to the Views menu on your list and selecting “Create new view”. This will bring up the Create view dialog, as shown in the image below. Give your view a descriptive name, such as “Prompt Cards,” so that it’s easily identifiable for both you and your team members. Then, select Gallery under the Show as section to display your prompts in an engaging, card-style layout that is more interactive than a standard list. When you’re ready, click Create.

Next, access the View Formatting pane by clicking on the view name again and selecting “Format current view”. Ensure that “Gallery” is still selected as the view type at the top of the formatting pane. Now, switch to “Advanced mode” to open the JSON editor. This is where you’ll apply the custom JSON code that defines the appearance and functionality of your Prompt Library’s cards.

Head over to my Prompt Cards List View Formatting Sample repository on GitHub. Open the prompt-cards.json file and copy the JSON code provided. Return to the SharePoint JSON editor, paste the copied code, and then save your changes. You should now see your Prompt Library transformed into a dynamic and visually appealing set of cards.
Crowdsourcing Prompts for Your Microsoft Lists Prompt Library
Your Prompt Library becomes even more valuable when it’s populated with diverse, real-world prompts contributed by your team. By using the Microsoft Lists forms experience, you can easily collect prompts directly from team members by sharing a simple form. Here’s how to customize and share the form to gather prompt contributions effectively.
Gathering Prompts
To start crowdsourcing prompts, you’ll first need to create a custom form within the Microsoft Lists experience.
Begin by clicking the Forms button at the top of your list, then select New form. This opens the form editor where you can customize the fields and appearance to match your needs.
For the form’s title, consider something engaging like “What’s your favorite prompt?” For the description, I recommend something like:
“We’re gathering the most effective and creative prompts used by our team members to enhance our collective productivity and innovation. Please take a moment to share your favorite prompt that you use in your work.”
This sets the tone and purpose for your form, encouraging team members to contribute thoughtfully.
Next, arrange the columns in a logical order to make it easy for users to provide prompt information. For example, ensure fields like Title, Prompt, Prompt Category, and Works in are clear and intuitive. Add descriptions to each field to guide users in submitting accurate and detailed responses.
You can also select a theme for your form to match your company’s branding or make it visually appealing. Additionally, you may want to configure any extra settings, such as controlling response notifications or scheduling when responses can be accepted.
Once the form is ready, click Send form to copy the link. This link can be shared via email, Teams, or any other internal communication channel, making it easy for team members to access and submit their favorite prompts.

Crowdsourcing Without Oversharing
One of the key benefits of using the Microsoft Lists forms experience is that it allows you to crowdsource prompts from your team without oversharing the entire list. This approach enables you to collect contributions while maintaining control over what is published to the Prompt Library. Team members can easily submit their prompts for review, and if you want to moderate submissions, setting up an approval workflow with Power Automate ensures that only reviewed and approved prompts are published, keeping the library high-quality and relevant for everyone to use.
Additionally, you can add the Prompt Library as a template using the Add-SPOListDesign PowerShell command. This makes the template available across your entire organization, allowing teams to create new lists based on the Prompt Library from various locations, such as site contents, certain site home pages, the SharePoint home page, the Microsoft Lists app, Microsoft Teams, or Office.com. This enables different teams and departments to create, collaborate, and curate prompts specific to their areas of business.


Leave a Reply